

SKU: RMS900102180
RMSTATOR
KIT STATOR+FLYWHEEL ASSTD POL RFR FITMENTS (RMS900-102180)
KIT STATOR+FLYWHEEL ASSTD POL RFR FITMENTS (RMS900-102180)
Couldn't load pickup availability
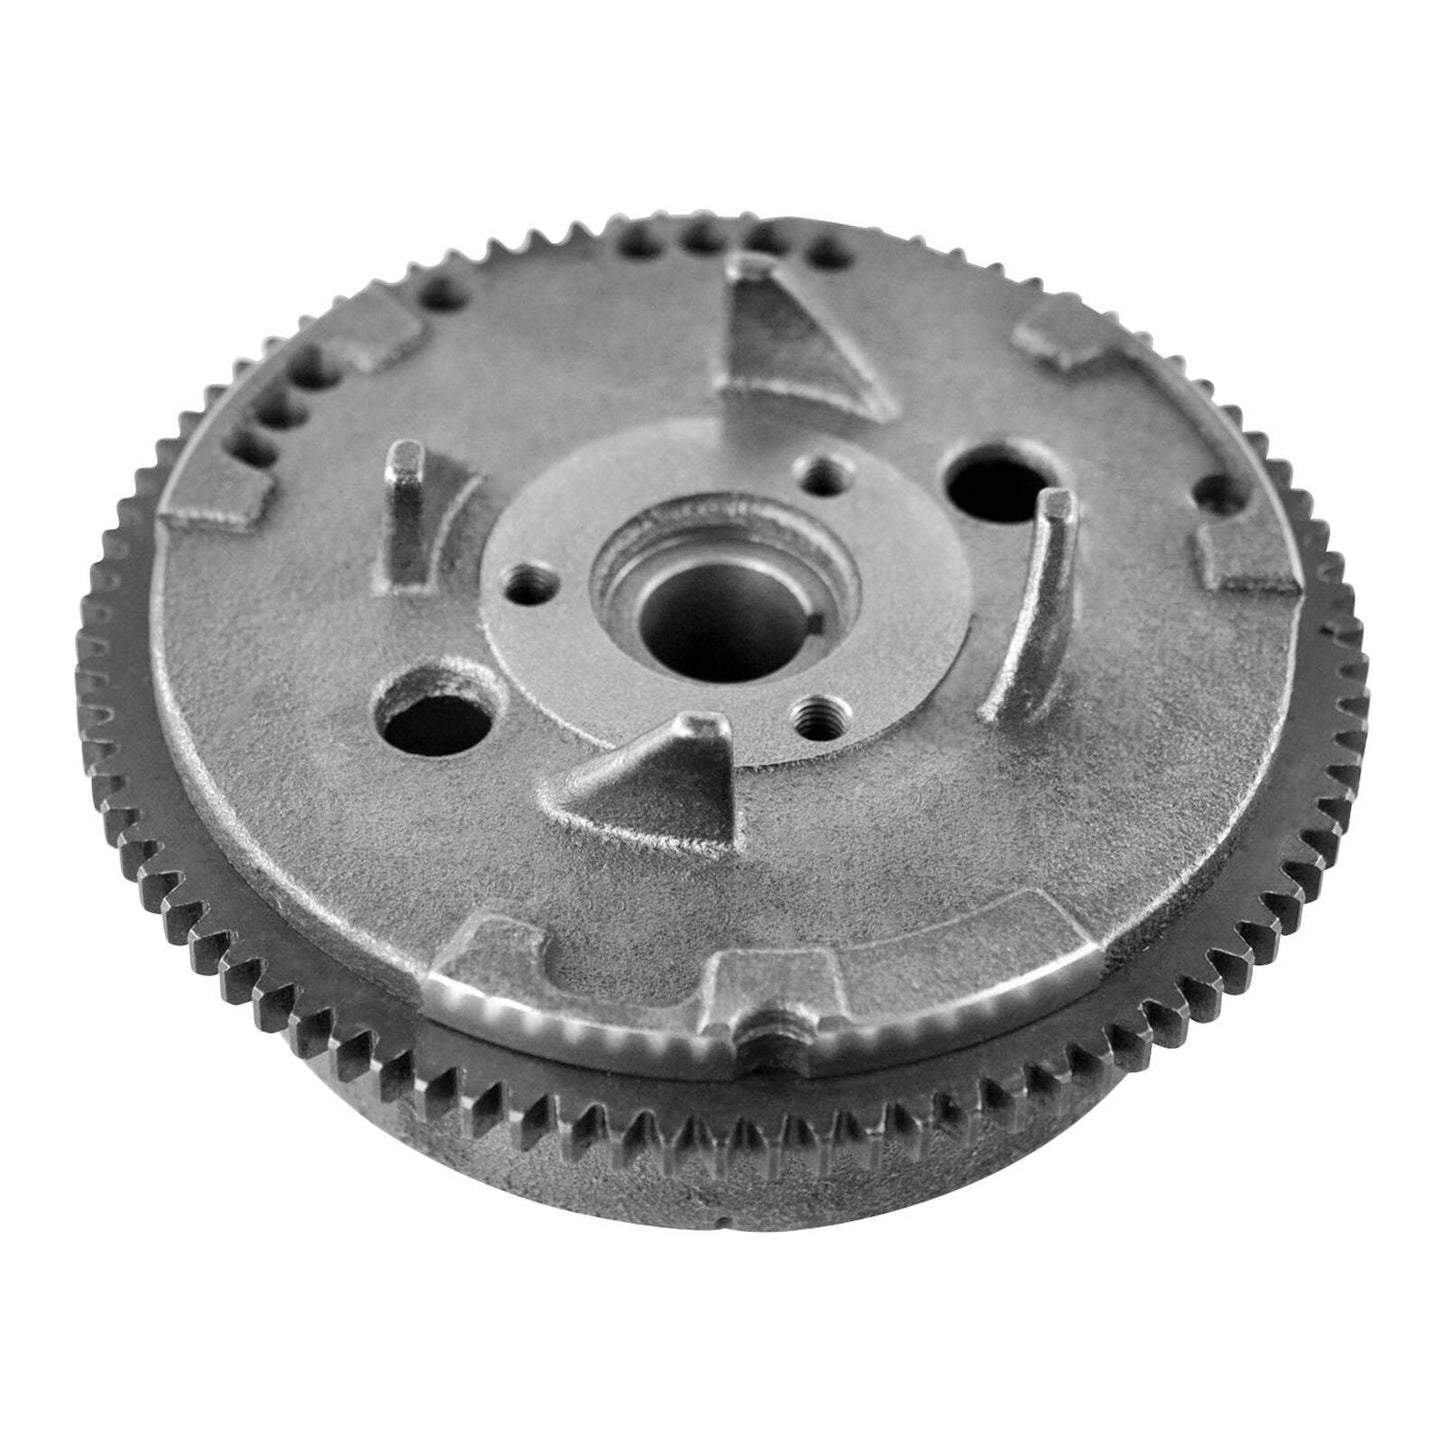
Two flywheels exist for Polaris 500cc models. This flywheel has the code FF97 stamped on its back. If in doubt, please refer to the specifications.
Heavy-Duty Flywheel Rotor for Polaris 500cc ATVs
Anyone who rides or repairs Polaris 500cc ATVs is probably familiar with the flywheel problems common to these models. Many of these vehicles experience at least one flywheel failure during their lifetime. Low-quality epoxy was used on OEM flywheels to secure the magnets to the rotor body. Over time and through repeated heat cycles, the epoxy can fail, allowing the magnets to come loose and contact the stator, potentially causing catastrophic damage.
For years, service shops and dealerships have offered low-cost repairs for Polaris flywheels as an alternative to the $400+ OEM replacement. This may sound like a good idea initially, but there are some serious issues to consider.
A common repair involves using JB Weld Marine Blue Epoxy to reattach loose original magnets or install new ones. Epoxy repairs can provide a short-term fix when done correctly. However, this type of repair can cause immediate problems and affect the long-term reliability of the ATV.
A Heavy-Duty Flywheel to the Rescue!
The new RMSTATOR heavy-duty flywheel rotor for Polaris ATVs is a well-priced solution to common OEM flywheel problems and an excellent alternative to the mechanical issues that can result from repairs.
Features:
- Built to OEM size: Fits precisely for straightforward installation.
- Improved epoxy: Uses high-temperature epoxy that is stronger than OEM epoxy, reducing the risk of magnet detachment.
- High-grade steel capping: Helps prevent harsh additives in motor oil from degrading the epoxy attaching the magnets. If a magnet ever comes loose, the sleeve is designed to keep it from contacting the stator.
- Precise balancing: Helps eliminate crankshaft vibrations for improved engine longevity.
- Tested products: All products are tested.
Don't waste time with temporary solutions. Replace your flywheel with a heavy-duty solution.
Why Cheap Repairs Won't Work
Stronger epoxy repairs may provide a short-term fix, but they can affect the long-term performance and reliability of the vehicle.
- Remaining OEM magnets: Original magnets that remain in place can still come loose at any time.
- Magnet alignment: Magnet alignment around the flywheel is critical for proper stator operation. Even minor misalignment can significantly reduce stator efficiency.
- Magnet spacing: Excessive epoxy or incorrect magnet spacing can affect flywheel balance, potentially causing stator contact or crankshaft damage.
- Incorrect replacement magnets: The magnetic field strength of replacement magnets must match the originals. Stronger magnets can quickly cause stator failure, while weaker magnets can significantly reduce stator output.
- Wrong epoxy properties: Epoxy must be rated to withstand high temperatures and oil immersion. Unsuitable epoxy can cause serious failure.
- Oil contamination: Incorrect epoxy can contaminate the crankcase oil and damage the engine.
For these reasons, we strongly recommend replacing a broken flywheel with a new OEM flywheel or the RMSTATOR heavy-duty flywheel.
Stator Installation:
Before installing the new stator:
- Check the AC output of the stator.
- Replace any burned or corroded connectors on the stator and regulator/rectifier.
- Check and repair any melted wiring.
- Use high-temperature dielectric grease on all connectors.
The stator may use a different wire colour code from the original. All wires are installed in the correct order; do not change any wiring configurations. This stator is designed as a direct plug-in replacement and should be used as such.
When bolting the stator in place, always use locking compound. If the stator includes a pickup coil, ensure the air gap is correct during installation. We recommend setting it as close as possible, but no less than 0.010 inches.
Flywheel Installation:
Before attempting to start the Polaris, adjusting the air gap is necessary. Rotate the flywheel until the raised node is aligned with the pickup/pulser coil. Adjust the gap as close as possible, but no less than 0.010 inches.
Warning:
Risk of electric shock. Disconnect the battery before servicing.
Ensure proper installation by a qualified technician to avoid malfunction.
Stator Dimensions:
- Interior diameter: 51 mm
- Exterior diameter: 114 mm
- Thickness: 20 mm
Stator Specifications:
- Number of wires: 9
- Number of plugs: 7
- Number of pins: 10
Wire-to-Wire Resistance:
- Alternator: Yellow to Yellow/Red = 0.6 ohms ±20%
- Pickup: White to White/Red = 100 ohms ±20%
- Source: Green to Red/Black = 450 ohms ±20%
- Source 2: Green to Black = 3.8 ohms ±20%
Flywheel Dimensions:
- Exterior diameter: 141 mm
- Interior diameter: 117 mm
- Interior diameter of centre housing: 25 mm
- Exterior diameter of centre housing: 23 mm
Share